
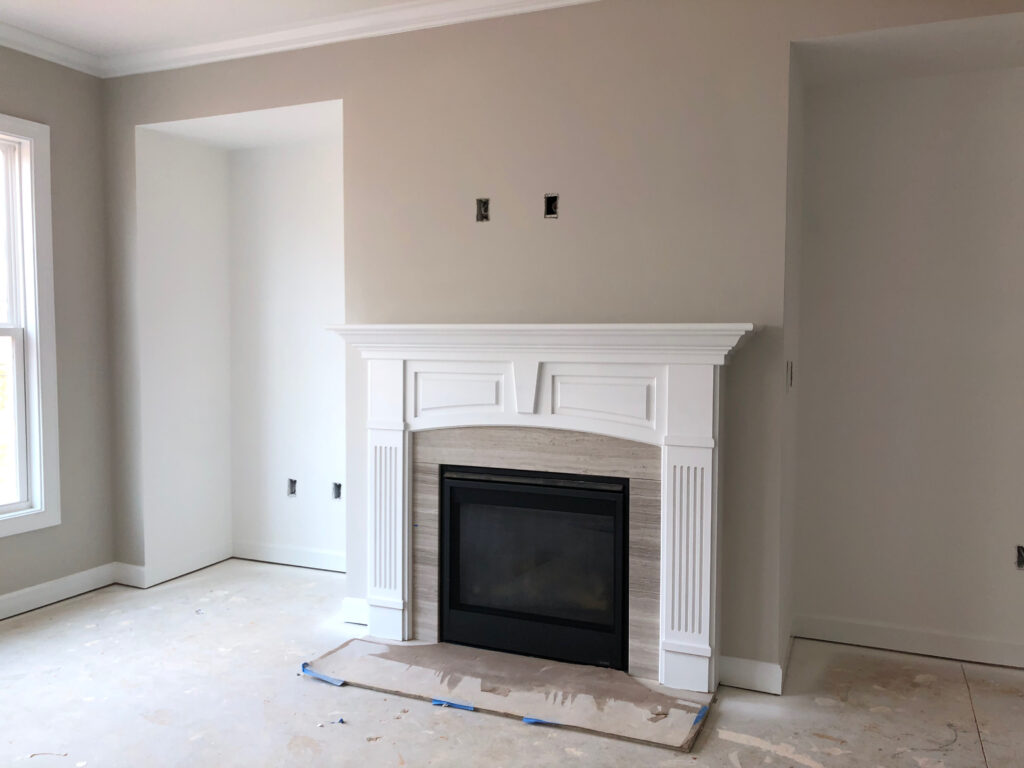
When we built our current house we left it as builder basic as possible. In the living room the fireplace had a niche on each side that if left open, really looked odd. All the model homes for the builder had cabinets or shelves built around the fireplaces and it made them look really nice. When we priced the cabinets to be done by the builder, we were blown away by the quote, so just decided to leave them and we would deal with the holes later. While I had built things before myself, I was not so confident I could build cabinets so we hired that part out. I think now I could do it, but a few years back I did not have the confidence in myself. This was the fireplace before we moved in.
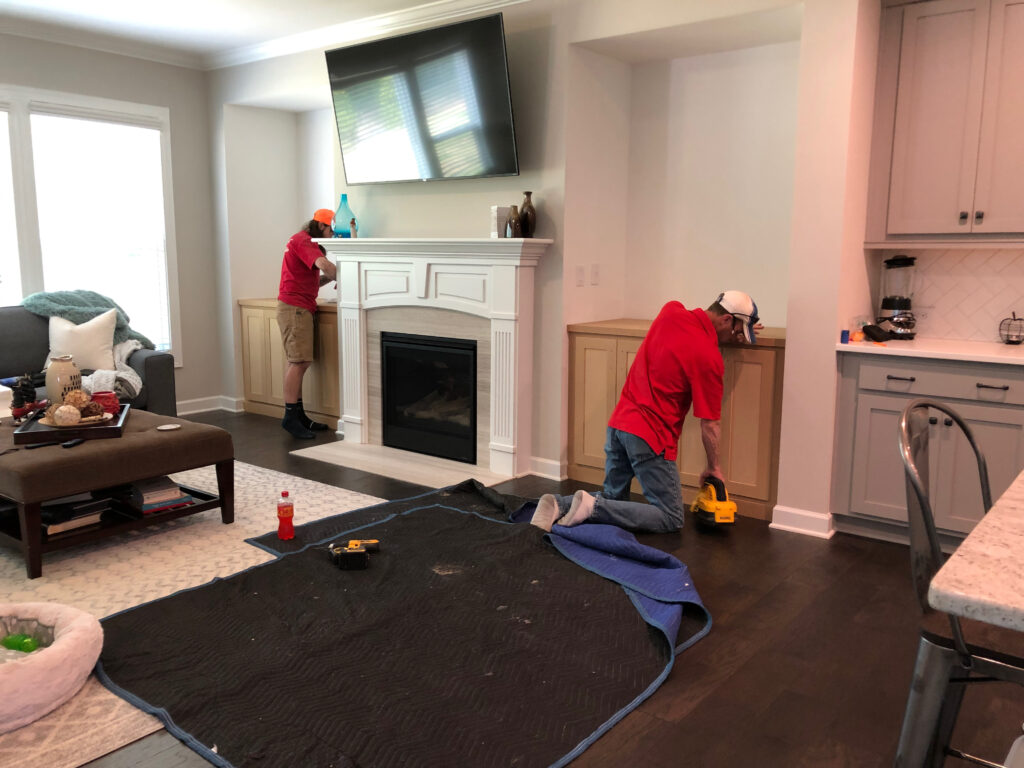
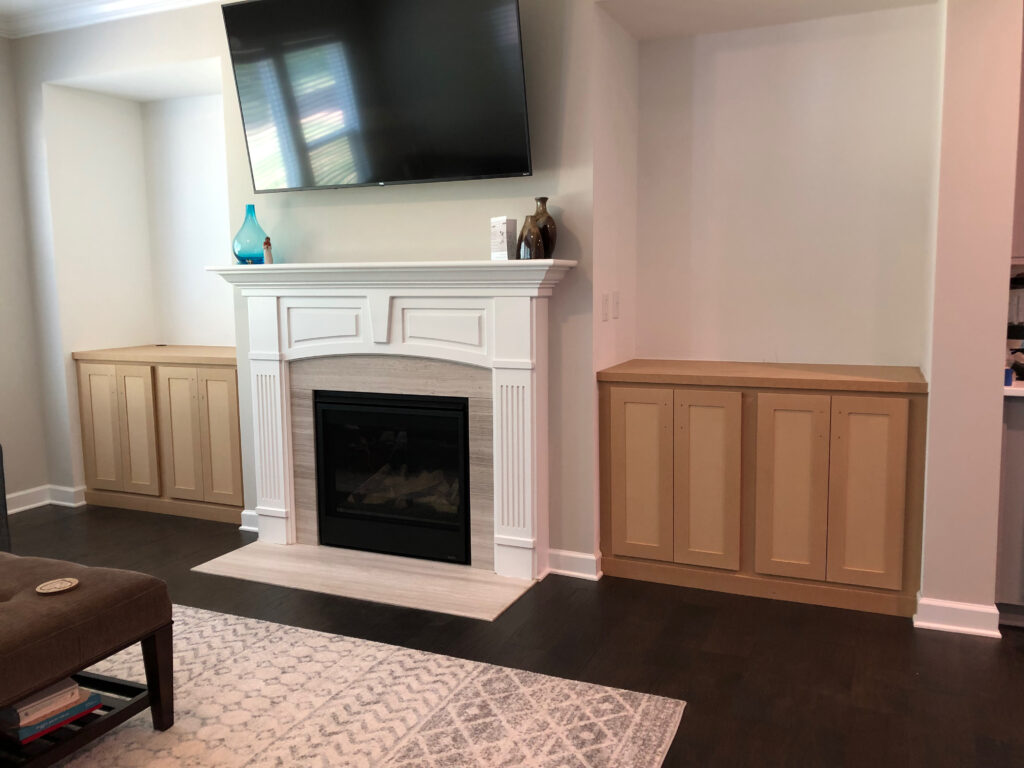
We actually choose the same vendor that the builder used for all their built ins in their models and homes. We could not believe the price difference by just going straight to the source. They did an amazing job and I was blown away by the meticulous job that was done. While the cabinets made a huge difference and framed out the fireplace perfectly, I felt something was missing. I sat on this for at least six months and then I realized, while the cabinets did make a difference, the wall behind them felt very plain.
I decided to shiplap the back walls of the niches and add two floating shelves stained closer to the color of our floors. I grabbed all the shiplap and cut it down to the width needed then painted it all. Once the shiplap was dried, I nailed it up and caulked where the shiplap met the wall. Just adding this small detail made a world of difference and it was already starting to look how I envisioned it.
It was now time to make the shelves. I went to Home Depot and bought 4 1x12x12 foot poplar boards and 2 1x2x12 foot poplar boards to makes the shelves. The shelves are made of three pieces, the top and bottom piece that are 12 inches wide and a front piece that hides the edges of the top and bottom of the shelf. To make these shelves I started by attaching support cleats to all three sides of the walls in the niches. I placed two support pieces in the middle to make sure the boards from the shelves would not bow. I then cut the top and bottom pieces that would make the shelves to size and attached these pieces to the support cleats using my brad nailer. Before nailing the boards I made sure that the boards were leveled. I then added the front piece to the shelf making sure the top and bottom were flushed and nailed them in place with the brad nailer. Once I had all four shelves done I protected them with a wax coating. I just wiped the wax onto the wood in a circular pattern and with my buffer, buffed it out. I had to leave the shelves untouched for 24 hours to let the wax harden.
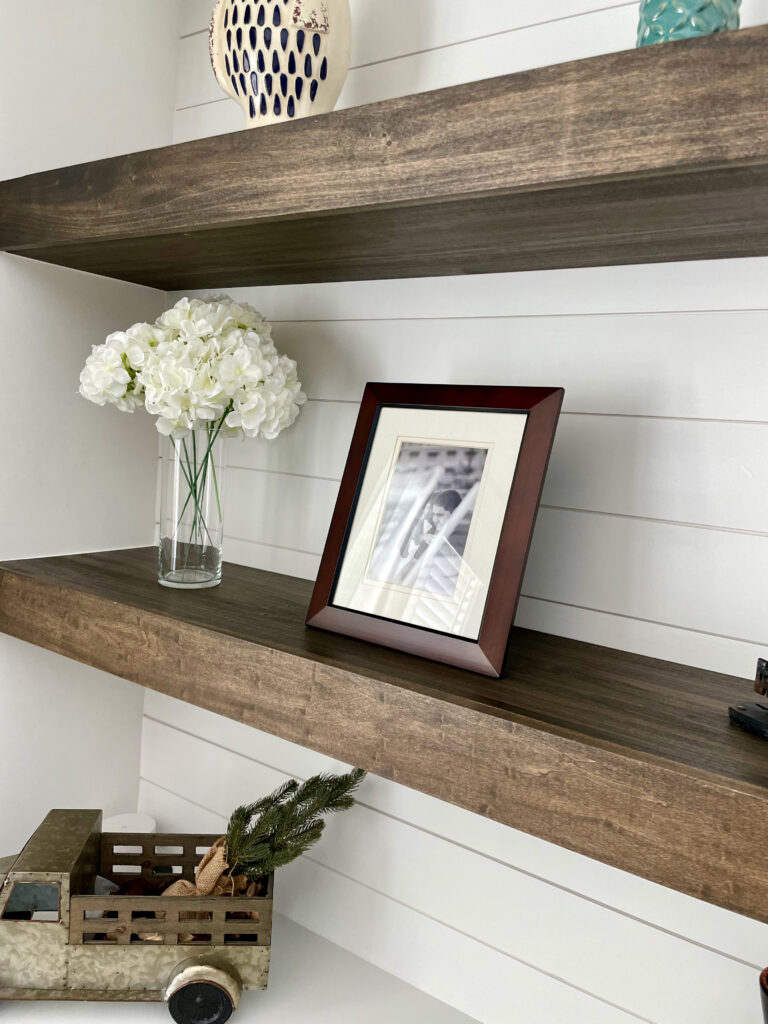
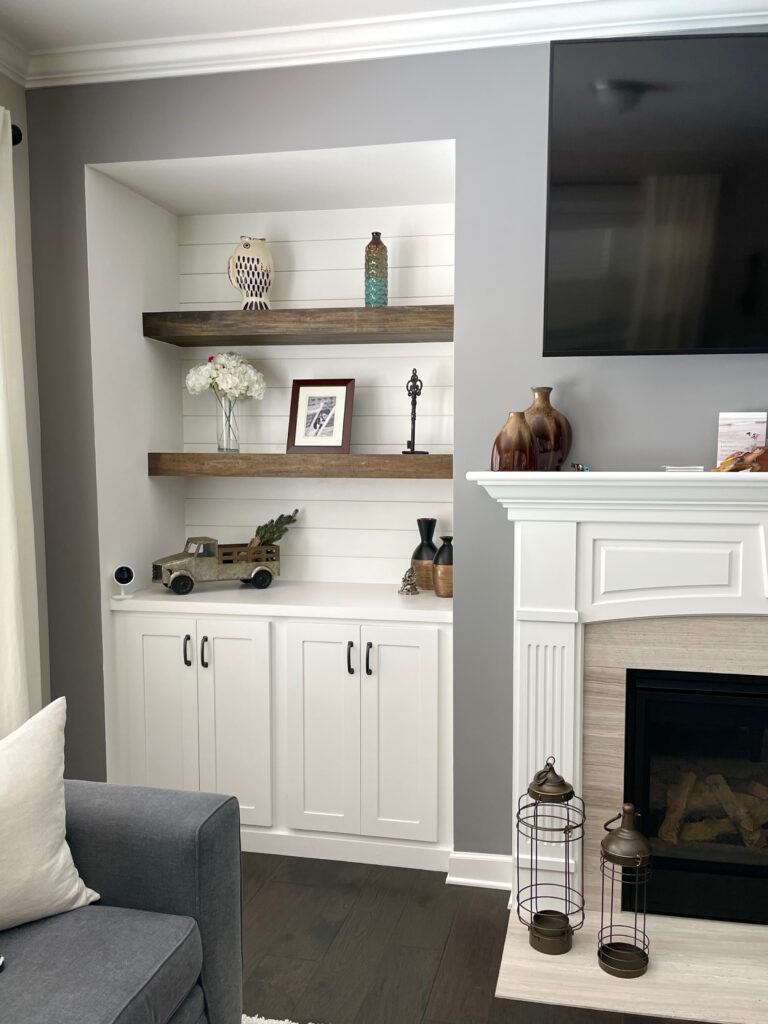
The shelves came out beautiful and completed the space nicely. The shiplap with the shelves were just what this space needed to complete it. It looks completely different from when we first moved into our house and I love it so much. It completes the fireplace area.
This was another project that I did before I had any idea I would create a blog so I am very sorry for the lack of pictures on the steps.
Happy DIYing
Adriana
I love reading an article that cann make men and women think.
Also, thank you for permitting me to comment! https://Www.waste-ndc.pro/community/profile/tressa79906983/